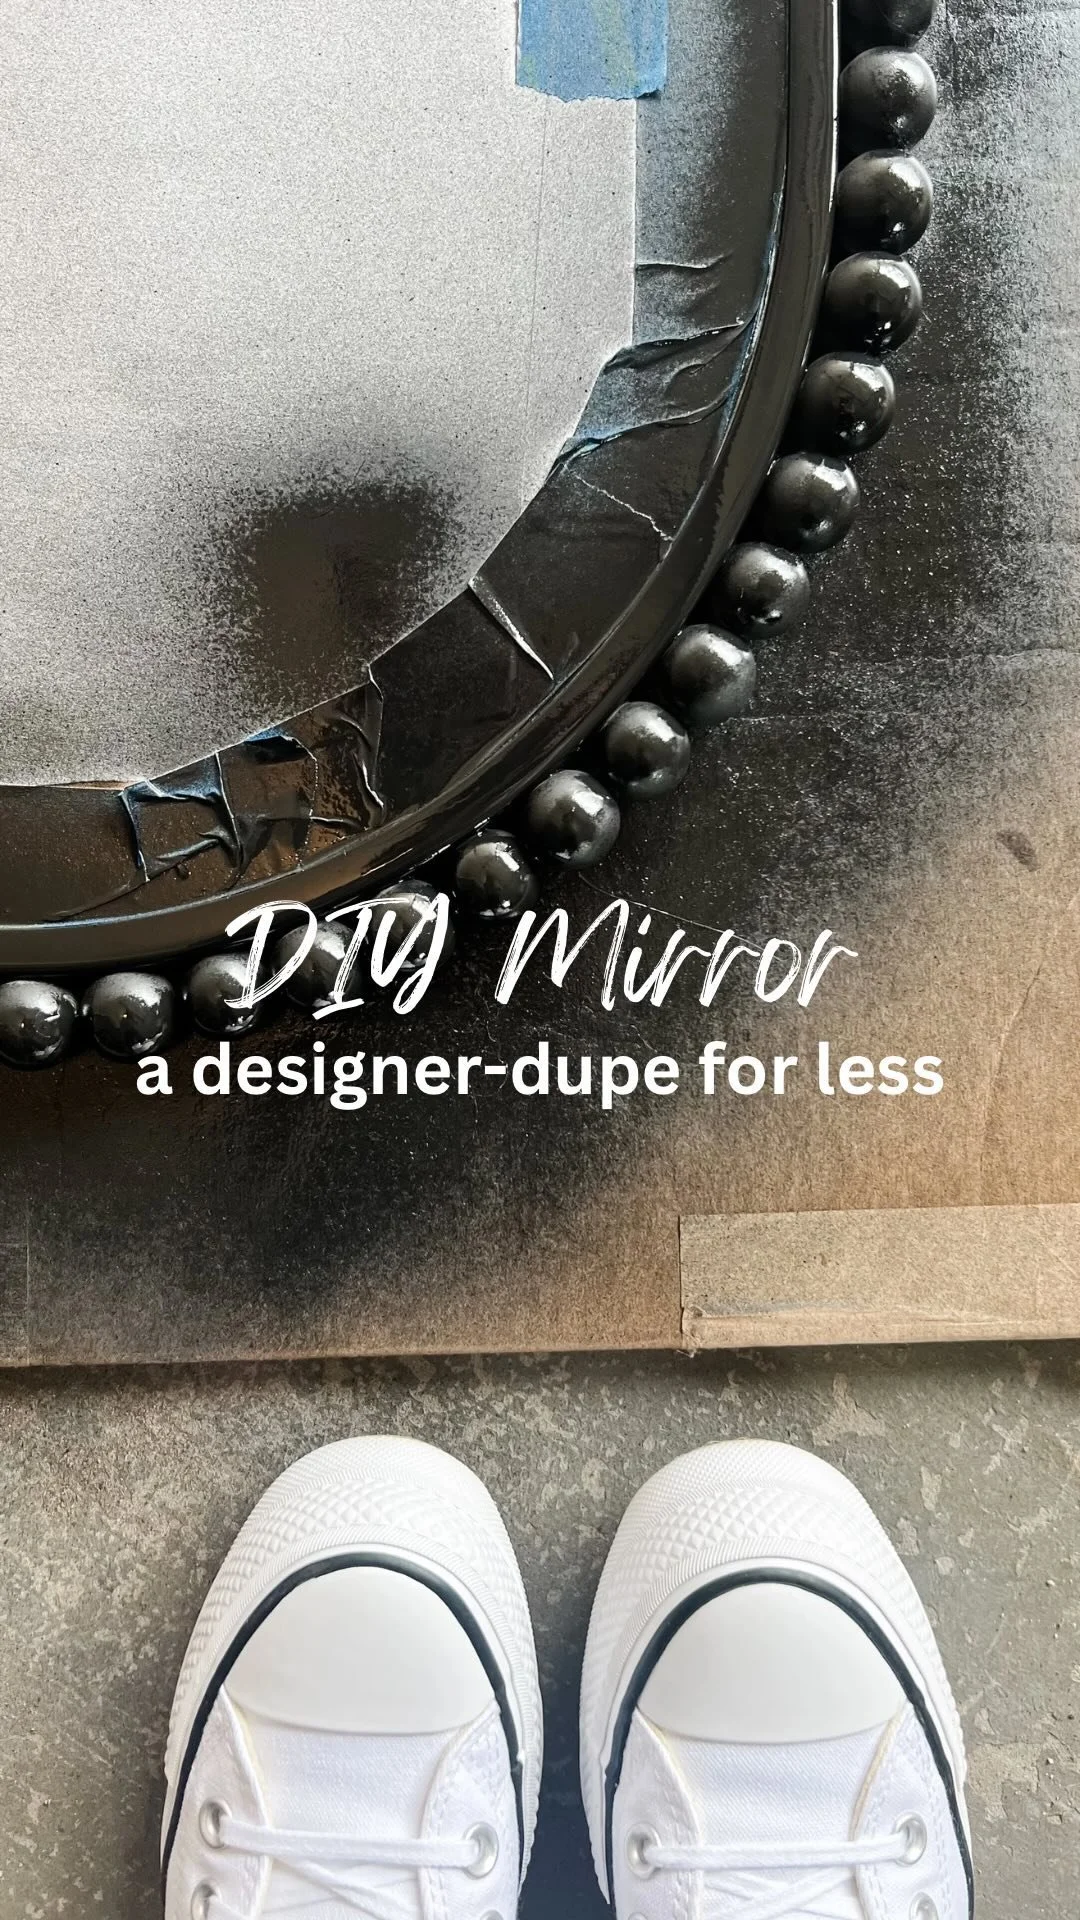
DIY Designer Dupe Mirror

The new trend taking over social media is all about having a “Pottery Barn, Crate and Barrel, and Anthropologie taste” while being on an “Amazon, Walmart, and Target budget” but can I just say - those last three options can be expensive, too!
To really save money, doing it yourself can be best and this DIY designer-dupe mirror is beyond good. Can you even believe that I made this mirror with only FOUR total materials? Insane.
Material List
An arched or circular mirror
I used THIS ONE from Target because I had it lying around
THIS oval mirror comes at a great price
Favorite circular mirror in numerous size options
Wooden balls - I used THESE 1 in balls and they worked great! They line up with a standard, modern mirror frame really nicely
Superglue - I tried three different options and this one was my favorite.
Sandpaper for scuffing the frame and flattening one side of each ball.
How-To
Before I get into the tips and tricks, I’d like to recommend that you only use an arched, circular, or oral mirror for this project. I tried doing it on a rectangular mirror first and couldn’t get the corners to look right. Avoiding needing to work around corners by picking the right mirror (like the ones I listed above) and you’ll be all set!
1. PREP & PROTECT - Start by protecting your mirror. I used common printer paper and blue painter’s tape to cover the entire mirror. Be sure to take some time here. Take the extra time to protect your mirror now so you don’t have more cleaning to do later.
TIP: While I covered the entire mirror, I left the frame exposed so I could paint it with the balls later. I wanted them to match.

2. SAND - After your mirror is all nice and protected, sand down the frame. This can be a quick scuff sanding - nothing crazy here. Scuffing the frame a bit (especially if it is a metal one like mine) will allow the super glue to attach a bit easier.
3. KEEP SANDING - Speaking of sanding, you’re going to want to spend some time sanding down the balls on ONE SIDE ONLY. Sanding one side will create a flat side on the ball. This flat side is what you’ll use to glue it to the frame.
4. Now for the fun part! GLUE - Start gluing your balls down. Now, I’d love to say I measured to ensure that all the balls would fit perfectly but I didn’t and I had a bit of a gap when I was done. I “fixed” it by just moving a few of the balls around and added the tiniest space between 5-7 of them. You’ll never notice the ones that have a tiny bit of space vs the ones that touch.

HERE is the glue that I loved. I actually used 3 different types. This one is messy but it stuck the quickest and strongest. I went through four tubes of it for this mirror so just plan ahead and buy this pack in bulk - especially if you’re mirror is larger than mine.
TIP 1 - When I first started gluing the balls to the frame, I had a VERY difficult time and kind of wanted to call it quits. After slowing down, I realized the that glue just takes time. That simple. It isn’t going to set in 2 seconds flat. You need to apply a bit of pressure to the ball for a few seconds before letting up.
TIP 2 - Apply the glue in two spots: to the mirror frame and the side of each ball. Put the glue directly on the mirror, stick the ball down, add a bit more glue to the side of the ball, and then stick the next ball on. I had the best luck with glue on the bottom and side of the ball. This adhered the ball to the frame and it’s buddy next to it.
5. PAINT - Since you protected your mirror so well at the beginning of this project, go on with your spray paint self and get to spraying! I always use THIS matte black Rust-Oleum. It goes on really, super shiny but dries with the perfect matte finish.

6. Hang, style, and brag about that mirror!

I’m not often impressed with my projects but this one is definitely a favorite. I actually can’t believe how well it came out!
Disclaimer: as an Amazon Associate I may earn a commission on qualifying purchases.
Share this with a crafting buddy and make one together. As always, follow along on Instagram for the latest happenings and projects. Can’t wait to hear about your next project soon!